
[WebGIS] HTML5跟踪GPS轨迹(9)查看走过的轨迹
发布时间: 2016-11-18
所属分类: 使用HTML5开发GIS应用
经过前面对HTML5、VueJS还有百度地图的折腾,剩下的工作也就水到渠成了,接下来我们将通过百度地图查看记录在IndexedDB的位置数据。
事件响应
首先响应 查看地图 按钮的点击事件,如图:
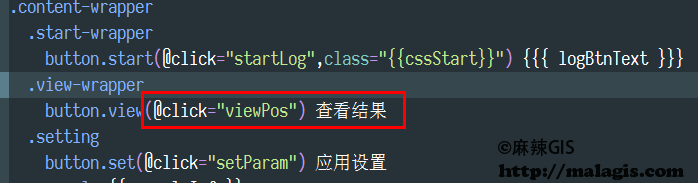
点击按钮,响应viewPos函数,如下:
/**
 * 查看地图
*/
viewPos() {
  this.mapObj.show = true;
  // this.mapObj.mapStore.clearOverlays();
  const request = window.indexedDB.open('myLocation', '1');
  request.onsuccess = (openData) => {
    const pointArr = [];
    this.db = openData.target.result;
    const objectStore = this.db.transaction('locations').objectStore('locations');
    objectStore.openCursor().onsuccess = (event) => {
      const cursor = event.target.result;
      if (cursor) {
        const tmpPoint = new BMap.Point(cursor.value.longitude, cursor.value.latitude);
        pointArr.push(tmpPoint);
        cursor.continue();
      } else {
        // 重采样
        const minPoints = [];
        for (let i = 0; i < pointArr.length; i++) {
          if (i % 9 === 0) {
            minPoints.push(pointArr[i]);
          }
        }
        // 添加地图工具条
        const tln = new BMap.NavigationControl({
          anchor: window.BMAP_ANCHOR_TOP_LEFT,
        });
        this.mapObj.mapStore.clearOverlays();
        this.mapObj.mapStore.addControl(tln);
        this.mapObj.mapStore.centerAndZoom(minPoints[0], 15);
        // 批量转换坐标
        const convertor = new BMap.Convertor();
        let tParr = [];
        for (let i = 0; i < minPoints.length; i++) {
          tParr.push(minPoints[i]);
          if (tParr.length % 9 === 0) {
            convertor.translate(tParr, 1, 5, this.transDis);
            tParr = [];
            tParr.push(minPoints[i]);
          }
        }
        convertor.translate(tParr, 1, 5, this.transDis);
      }
    };
  };
},
其中这里先将IndexedDB中的位置数据做一个遍历(详细请看:HTML5跟踪GPS轨迹(2)IndexedDB使用精简入门上篇),因为采集的数据太多,会影响加载速度,所以做了一个重采样(每隔9个点要一个),transDis函数用于转换GPS坐标到百度坐标(详细请看:HTML5跟踪GPS轨迹(8)再谈百度地图的坐标转换(V2版)),并将转换后的坐标叠加到百度地图上。transDis函数代码如下:
/**
 * 转换坐标并显示
 */
transDis(data) {
  if (data.status === 0) {
    const newPoints = [];
    for (let i = 0; i < data.points.length; i++) {
      newPoints.push(data.points[i]);
    }
    const polyline = new BMap.Polyline(newPoints, {
      strokeColor: 'blue',
      strokeWeight: 6,
      strokeOpacity: 0.5,
    });
    this.mapObj.mapStore.addOverlay(polyline);
    this.mapObj.mapStore.centerAndZoom(newPoints[0], 15);
  }
},
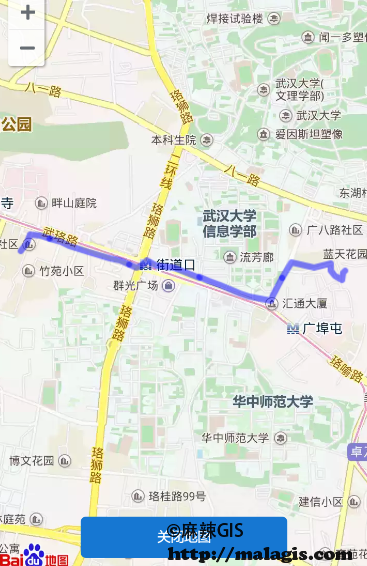
最终效果
下面两张图是将IndexedDB中的数据叠加到百度地图之后的效果,其中第一张是没有经过百度地图坐标转换的,第二张是转换之后的,偏差还是相当大的。不过转换后的效果还不错,符合我徒步的记录要求。
坐标转换前

坐标转换后
相关阅读


声明
1.本文所分享的所有需要用户下载使用的内容(包括但不限于软件、数据、图片)来自于网络或者麻辣GIS粉丝自行分享,版权归该下载资源的合法拥有者所有,如有侵权请第一时间联系本站删除。
2.下载内容仅限个人学习使用,请切勿用作商用等其他用途,否则后果自负。
手机阅读
公众号关注
知识星球
手机阅读

最新GIS干货

私享圈子


您代码能不能给的全一点呢
还不够全吗。。